When you buy a private registration number, you will need to know how to fit new acrylic number plates. Of course, there are other reasons we sometimes need to replace plates: they may occasionally get damaged, broken or even stolen. Here's a step-by-step guide to removing and fitting your number plates.
You will need:
- A medium phillips (cross) head screwdriver
- A drill and the correct sized bit for drilling plastics
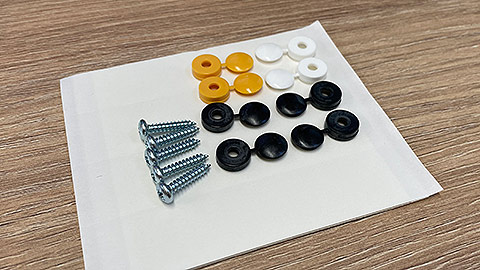
- Your number plate fixing kit containing screws, screw covers and sticky pads (you can use the existing screws or fixing kits are available when purchasing acrylic plates)
- A friend to assist (optional but recommended)
- Marker pen or pencil for marking hole positions

-
Remove your old number plates
If your old plates are screwed in place then simply remove or open the plastic screw covers (if present) and undo the screws. Keep the old screws for use in case your new plates don't come with the correct screws.
If the plate is secured with double sided pads or tape you'll have to work it loose. This can take a while as the mounting pads use very strong adhesive. Pull/prise the plate away from the car keeping up a consistent force. You may find that a tool such as a wallpaper scraper can be inserted behind the plate to help loosen it.
-
Decide between screws, adhesive pads or both
Each method has its pros and cons.
Screws are easy to remove in case you need to change plates again in the future, but they can be less secure against theft unless you use special security screws. The problem with those is that you lose the easy removability.
Sticky pads are very secure and are the method recommended in number plate regulations. The downside is that adhesive can degrade over time. Also, if all surfaces aren't completely clean at the time of fitting, pads may not adhere properly.
If security is your main concern then you can always combine the two methods and use both.
When you've decided on your mounting method(s), follow whichever of the following steps are relevant.
-
Drill holes for the screws
Most plate manufacturers recommend drilling from the back, others recommend applying masking tape to the front of the plate and then drilling from the front. Check any instructions that may be supplied and use the method recommended by the supplier or manufacturer.
Using the old plate as a template, mark the positions of the screw holes, then use a bradawl or small cross-head screwdriver to make a guide/starter mark or hole to keep the drill bit in place when drilling. (Alternatively, you may clamp the old plate in place over the new one as a jig to get the right placement for the holes.)
Place the number plate on a piece of scrap wood and then carefully drill each hole through the plate in one go. Clean any plastic swarf from the holes.
-
Mount and affix your number plates
Hold the number plates up against the car to check size and position.
Remove any protective film from your number plates.
If using screws
Hold the new number plate in place. If you have new screws that will fit the existing mounting holes then use them to secure the new plates in place, otherwise reuse the old screws. If you are using a Regtransfers number plate fixing kit you should use the plastic screw covers to protect the screws and help them blend in with the plate background. These covers may not fit if you are reusing old screws.
Ensure that you use the correct coloured screw covers for the background colour of your number plate. Screws and covers must not interfere with the readability of your plates, or alter any of the characters.
If using sticky pads
Ensure both the back of the plate and the receiving surface in the car are clean. Remove the backing paper from one side of the pads and stick them in position on the back of the plate. We recommend two pads at each and and two in the centre of the plate.
Remove the backing paper from the other side of the pads and carefully move the plate into position before making contact with the car. When you are happy with the position, press the plate firmly against the car and apply pressure over the pads for at least 30 seconds.
NB: this guide refers to fitting or changing the physical plastic number plates on a vehicle. If you wish to change the registration number of the vehicle you must learn how to transfer private plates.
Share this...